Saturday, December 11, 2010

Mango Mousse & Passionfruit Layer Cake

Life and work has taken a slow toll on me and it's showing on my physical well-being. I've been inflicted with a persistent, antibiotic resistant cough for more than 1 month. It's slowly beginning to take a turn for the better, thank goodness. Enough about ranting now, time to move on to baking!

With all the things going on in my life, I've been baking less than I'd like to. So when Tania requested for Durian cupcakes for her birthday, I wasted no time in agreeing without hesitation.

But, where are the durians??? Are they still plumping their succulent flesh on the tree branch? Seems like the king of fruit was still comtemplating his fate, in hiding! I could not find a single thorny fruit! Plan B was whipped out and the lucky tropical fruit chosen was the delectable mango.

I made a basic vanilla cake, layered it with layers of mango mousse, added fresh passionfruit and fresh chunks of mango. The cake was covered in light whipped cream, coated lightly with roasted pistachos and topped with a sprig of fresh mint. Voila!


At the restaurant, I asked the waiter to put the cake in the chiller. He went ahead to put in in the display cabinet, making it look like one of the cakes for sale. I got a cheap thrill out of it! :) It really dressed up my cake and glammed it up!


The mango mousse and passionfruit worked together really well. The lightness of the whipped cream balanced off with the richness of the vanilla cake. The chilled cake tasted really fresh and yummy.


Mango Mousse
adapted from http://chefwantobe.blogspot.com/2010/06/mango-mousse-cake.html

17g gelatine powder
60g hot water
250ml whipping cream for mousse
3 tbsp icing sugar
1/2 cup fresh mango
1 tsp honey

Instructions:
1. mix whip cream & icing sugar. Whip until mousse stage.
2. Save 100ml for topping.
3. Dissolve gelatine in hot water. stir well.
4. Puree fresh mango with honey.
5. Mix gelatin mixture to pureed mango. Stir well. Mix to 150 ml whipped cream.
6. Chill until ready to use.

Sunday, August 8, 2010

Cheddar Chive Biscuits

I've not been baking for 2 weeks! Was itching to bake this weekend. It was a Sunday afternoon where I craved some rest and relax time after a particularly hectic week. Naturally my thoughts drifted to baking and I found myself wandering into the kitchen in the late evening.

I've been wanting to try the Cheese and Chive biscuits I saw from the Williams-Sonoma baking book for a while now. The ingredients sound healthy (very little butter and no sugar!), best of all, it looked yummy!

It was not difficult to prepare at all. Although I do need a pastry cutter pronto! the "2 knifes" tactic was painful for my wrists after a while and it took ages to get the mixture to resemble "coarse crumbs".

Alas, all' s well that ends well (feeling slightly Shakespeare-ish. Hm I wonder if they had Cheddar Chive biscuits or scones in the 1500s). Snap back to the current day. lol. I added a little extra cheese since the cheese I used was not super strong cheddar. I also cut the dough into tiny circles, slightly bigger than a 50 sen coin.

The results:


Like how a biscuit should be, it was crispy on the outside. Inside, it was slightly moist and doughy. Not too dry overall. The cheese smelt divine and the chives gave the biscuit a savoury flavour.

I popped one into my mouth warm and fresh from the oven. It reminded me of the Chive and Onion biscuits I recently bought near my office as a tea time snack. Hm... now where did the onion relation come in. It must have been the chive taste, which is slightly herby.


Would I make this again? YES in a heartbeat. It would go well with creamy soups or even a hot cup of tea.


Cheddar Chive Biscuits
from Williams-Sonoma baking

Ingredients:
315 g flour
2 1/2 tsp baking powder
1/2 tsp salt (can be omitted as cheddar cheese is slightly salty)
60 g finely shredded extra-sharp Cheddar cheese
10 g minced fresh chives
90 g butter, unsalted, cold and cut into cubes
180 ml milk

Instructions:
1. Line a rimless baking sheet with parchment paper.

2. In a large bowl, stir together the flour, baking powder, salt, cheese and chives. Using a pastry blender or 2 knives, cut in the butter until the mixture forms coarse crumbs about the size of peas. Add milk to the dry ingredients and using a rubber spatula, stir until just evenly moistened.

3. Turn out the dough onto a lightly floured work surface and press together gently Knead the dough about 6 times and form into a ball. Pat into a circle about 2cm thick. Using a floured biscuit cutter, cut out rounds and place them on the sheet, spacing about 1 inch apart. Gather the scraps, pat out again and cut more biscuits. Bake until biscuits are golden brown, about 15-18 minutes.

Makes 12 (if using the recommended 7.5 cm cutter)
I used the smaller cutter and got a good 20+ biscuits

Review: San Terri Green Tea Chiffon Cake

I love San Terri's Green Tea cake.

The first recipe in this blog was the Green Tea cake by San Terri, as published in Flavours magazine. It did not turn out exactly like the cake in the shop, especially the cream. I may have missed something or used an ingredient which was not of adequate quality. The recipe remains to be retested.

There is a little San Terri shop in Menara Hap Seng in KL, an isalnd of a shop with no walls, very near my office. One day after lunch I dropped by and saw a new cake! the Green Tea Chiffon Cake.

Basically the same base cake as the Green Tea cake, but without the cream filling. With added adzuki beans in the cake itself.

I bought the whole cake. It set me back only RM 6.50. Compared to one slice which was about RM 5.


As I would expect from normal chiffon cakes, the cake is not moist on its own. It is dry, airy, light with a subtle taste of green tea that hits your palate about 3-4 bites into the cake. The adzuki beans were not too soft, slightly hard and provides texture with a nice crunch.

It is the perfect companion for a morning / afternoon cup of tea and one slice is never enough!

My Ratings

Presentation: 4/10
Texture: 6/10
Taste: 5.5/10
Price: 8/10 (in terms of affordability)

Recommended: Only for the avid green tea fan.

Check out San Terri's website here for location and other products.

Saturday, July 24, 2010

Review: Bisou Cupcake

Was having dinner at KLCC a fortnight ago and saw Bisou's little cupcake shop. It was a little island beside the centre court. No walls, open concept.

Business was brisk!
I looked around the cupcakes on offer, they were all so colourful.
It took me a while to decide which to get. Although there were many cupcakes, they were basically play arounds of classic tastes.

For example, vanilla cupcake with vanilla frosting (I'll call it vanilla on vanilla for ease of reference). They also have vanilla on chocolate; chocolate on vanilla; chocolate on chocolate; vanilla on chocolate ganache; chocolate on chocolate ganache; coffee on coffee; chocolate on coffee; vanilla on nutella; chocolate on nutella; vanilla on lemon etc. You get the idea. It seems a lot, but essentially, there are only 2 base flavours and about 8 frostings.

I opted for Candied Lemon, which turned out to be cupcake of the month!
It came in a real pretty box. At RM 5 a piece, it was affordable.


The cupcake was regular sized and looked very pretty.
I took a bite into the frosting and cake.

The flavours were not overwhelming, just the right hint of citrusy taste with a hint of sourness. The cake is dense and moist, in a good way. It was not too airy, and had the right amount of sweetness.


The frosting is buttercream, which essentially is butter + a lot of icing sugar.
Personally I have a slight aversion to buttercream. It usually is too sweet and the icing sugar gives a crunchy, almost sandy texture. There is no way to lessen the sugar unfortunately, because lesser sugar will make the frosting less firm and more prone to melt or not hold its shape.

My choice of frosting is Swiss Meringue Buttercream, consisting mainly of egg whites and very little sugar and butter. It holds its shape perfectly for piping and does not melt in humid weather. If you refer to my earlier post on Jenny's wedding, that was the frosting I used for the wedding cupcakes and everyone complimented on its taste. It was my mild dislike to buttercream that prompted me to search for an alternative which has the same properties as buttercream. SMB is the perfect choice and partner for a cupcake, in my humble opinion.

Anyway, back to the Citrus Lemon cupcake. There was a hidden surprise, a piece of candied citrus fruit (could be an orange / lemon) between the cup cake and the frosting, which was sweet and sour at the same time, an intense taste to say the least.

By the time I'd reach half the cupcake, I was on a mild sugar high! It would take me quite a while to finish the cupcake on my own, due to the intensity of the sweetness that comes after the 3rd or 4th bite.

It did satisfy my sweet craving and I was happy to have a little piece of dessert on a Friday night!

Check out Bisou's website here for more flavours.


My Ratings

Presentation: 6/10
Texture: 5.5/10
Taste: 6/10
Price: 8/10
Recommended: Yes, if you have a moderate to high sweet tooth

Photo credits: Taken with Mr O's Blackberry. Mr O also shared the cupcake.

Sunday, July 4, 2010

The Anzac Biscuit


According to Wikipedia, the origins of the Anzac biscuit can be traced to "WWI, around 1914–15. While some believe the biscuits were first made by the troops in the trenches with provisions they had at hand to relieve the boredom of their battle rations, the most widely accepted belief is that the biscuits were created by Australian and New Zealand women endeavouring to create a treat for their loved ones that would survive the long journey to the front."

More interestingly, the article pointed that ANZAC is a term solely for use by the government. A term not usable in commerce, not open to intellectual property exploitation rights. One of those rare occasions where my work and hobby collide!

According to Wikipedia, "the term ANZAC is protected under Australian law and therefore the word should not be used without permission from the Minister for Veterans' Affairs; misuse can be legally enforced particularly for commercial purposes. Likewise similar restrictions on naming are enshrined in New Zealand law where the Governor General can elect to enforce naming legislation. There is a general exemption granted for ANZAC Biscuits, as long as these biscuits remain basically true to the original recipe and are both referred to and sold as ANZAC Biscuits and never as cookies.

This restriction resulted in the Subway chain of restaurants dropping the biscuit from their menu in September, 2008. After being ordered by the Department of Veteran's Affairs to bake the biscuits according to the original recipe, Subway decided not to continue to offer the biscuit, as they found that their supplier was unable to develop a cost-effective means of duplicating the recipe."

So there...We'd have to call it a BISCUIT, unless you're feeling particularly bold one fine day to break the law and call it a COOKIE..

Lucky too that it is not a protectable geographical origin by virtue of being protected by government, if it were, any cookie not made in Australia and NZ would not be able to name itself "ANZAC", a la "champagne vs sparkling wine".

Alright, enough about IP law... the biscuits are beckoning.

The cookie was easy enough to make, no mixer is needed. I've had Anzac biscuits in Australia but wondered how the homemade version will fare as compared to it's commercialized cousin. The outcome is... homemade is truly the best.

One unconventional step was to dissolve 1/2 tsp of baking soda with 1 tbsp of boiling water, and pouring it into the melted butter and honey mixture. The mixture bubbled and foamed, it was amazing to watch, like dropping an effervescent tablet into a cup of water.


Butter, honey, oats, coconut in a cookie, you can't go wrong with that combination of ingredients. Just typing it makes me salivate and feel hungry at the thought of these delicious yummies.

Once I bit into the warm biscuit out of the oven, I silently thought how lucky the WW1 soldiers were. If I were a soldier, these will be the epitome of hope and all that home represents, its scent, taste and simplicity. It would have been many a soldier's only link to their warm and comfortable home in 1914. Stories like these adds a whole dimension to baking and enjoying the end product, like we're allowed a glimpse into the past, a little reminder of how good our life is now!

Don't hesitate! Try it, it's easy and very fulfilling!


Anzac Biscuit
Makes 26

Ingredients:
125 g plain flour
120 g brown sugar
100 g rolled oats
90 g dessicated coconut (I used freshly shaved coconut)
90 g organic honey
125 g butter
1/2 tsp baking soda
1 tbsp boiling water

Instructions:
1. Greast a baking tray and preheat oven at 180C.
2. Sift flour in large bowl, add sugar, rolled oats and dessicated coconut. Form a well in the middle of the bowl.
3. Melt butter and honey over low heat. Remove once combined and melted.
4. Dissolve 1/2 tsp baking soda in 1 tbsp boiling water. Pour the mixture into the butter mixture, the mixture will foam. Immediately pour into dry ingredients.
5. Use wooden spoon and mix till combined.
6. Scoop 1 tbsp amounts and drop on baking tray. Flatten slightly. Allow room for spreading.
7. Bake for 10-15 minutes or until the biscuits turn golden brown.
8. Cool on wire rack and enjoy!

Sunday, June 27, 2010

Lemon Buttermilk Bars

It is about time baked something apart from cupcakes.

I still love cupcakes, however it cannot be the only thing I bake all the time ;)

I've always been intrigued by lemon bars, having read them constantly in baking blogs from America / Canada.

Then one night during my pre-bedtime reading ritual, I stumbled upon a book I bought a year ago, Williams-Sonoma's baking "FoodMadeFast" which is the perfect book for baking for the part time baker with a tight schedule. The book is separated into 3 sections - 30 minutes from start to finish; 15 minutes hands-on time; Make more to store! Just select the recipe that suits your time frame and off you go. It's a brilliant book!

So coincidentally lemon buttermilk bars were featured suddenly all the lights came on in my head. This is absolutely the recipe to try this weekend, bonus point being that it supposedly takes only 15 minutes to make!

So how was my first attempt at bars? Frankly, more difficult than I thought! The pastry needed to be baked beforehand and cooled totally before pouring the lemon buttermilk filling and to bake for a further 15-20 minutes.

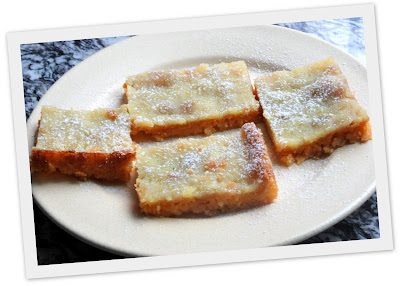
The results:


It took longer than 15 minutes in the kitchen, and to be fair the recipe did say it is 15 minutes hands-on time, excluding preparation work. Still, it was a pretty quick recipe to make. I'm beginning to love the sour sweet combination of flavours. Watch this space, I'll definitely be making more lemon bars in the future.


Lemon Buttermilk Bars
from Williams-Sonoma baking

Ingredients:
Unsalted butter 90g at room temperature
Granulated sugar - 60g plus 155g
Flour - 90g plus 2 tbsp
Salt - 1/2 tsp
2 eggs
1 tbsp finely grated lemon zest
Lemon juice - 80ml
Buttermilk - 125ml
Icing sugar for dusting

Instructions:
Crust
1. Preheat oven to 180C. Butter bottom and sides of 8 inch square pan
2. In a large bowl, use electric mixer on medium speed, beat together butter and 60g granulated sugar until creamy. Add 90g flour and salt and mix on low speed until blended.
3. Spoon the dough into pan and press evenly in pan bottom. Bake for 15-18 minutes until golden brown.


Filling

4. In a large bowl, use electric mixer on medium speed, beat eggs and 155g sugar until blended. Add 2 tbsp flour, lemon zest and juice, buttermilk and beat until smooth.
5. Pour into baked crust and bake for 20-25 minutes, until top of filling is set.
6. Let it cool completely in pan and cut into bars. Dust top with icing sugar.

Sunday, June 20, 2010

Healthy Nut Blueberry Muffin

There was a box of blueberries sitting in my refrigerator for more than 1 1/2 weeks, it was about time I made good use of it before it shrivelled up.

So this weekend I decided to whip up a healthy treat. My family is generally health conscious, opting for less sugar and less fattening desserts. So I looked up the internet quickly for a healthy blueberry muffin recipe from allrecipes.com. The link is here, though I made variations to the recipe.

I baked it in time for tea on this lazy Sunday afternoon and it was so easy to make! no mixing involved, amazingly, no butter is used and only 1 egg serves to bind everything together.

I had in mind huge muffin tops for mini muffins (so cute!) so i intentionally filled up the trays right up to the brim instead of the usual 2/3 to the top. It rose very high but very few overflowed to create the mushroom-like head which was the picture in my mind. One or two looked pretty close to it though!


Taste wise, it was pretty doughy and chewy, probably due to the lack of butter, oil, eggs, but otherwise, quite tasty. Sugar content is high too, I'd like to try honey one day as a healthier alternative to sugar.

What I love most is the bursting blueberries when you bite into them, and fresh out of the oven, it is moist and warm... mmm. Helps that it is bite size too, so one muffin really is never enough!
Try it out, if you are looking for a healthy alternative to the usual butter-rich muffins.


Recipe (my variation):

185g self raising flour
170g sugar
40g instant oats
235ml buttermilk
1 egg
15 ml vegetable oil
5ml vanilla extract
1 tsp baking powder
1 tsp baking soda
1 banana, mashed
1/2 cup chopped walnuts
1 punnet blueberries

Instructions:
1. Mix flour, sugar, oats, baking powder, baking soda in a bowl.Gently stir in the blueberries and walnuts.
2. In a separate bowl, mix together the mashed banana, buttermilk, egg, oil and vanilla.
3. Pour the wet ingredients into the dry, and mix just until blended. Spoon into muffin cups, filling all the way to the top.
4. Bake at 175 C for about 10 minutes (for mini muffins), or until toothpick comes out clean.
5. Enjoy!

Sunday, March 21, 2010

Green Tea Sweets

Last year around Christmas, I tried out a green tea shortbread recipe which I've had for ages but have not had the time to try out.

I used star cookie cutters as befitting the festive spirit, as well as a bear and bunny cutter I recently bought from the wonderful RM 5 Japanese shop, Daiso.

They turned out wonderful! The fragrance of green tea was delicious. Hmmm.. However, the next time I'd skip rolling the dough in sugar before baking. It was a little too sweet for my taste buds.

In retrospect, December was such a good time. Everyone was in holiday mood, work was bearable and I was happy! ;) Just looking at the pictures below makes me happy again. Try them, you'll not regret it!


From: lovescool.com

Green Tea Sweets

Ingredients
Yield (2” leaf shape): Approx 25

3/4 cup (2.25 oz) Confectioners sugar
5 oz Unsalted butter, cut into cubes
1 3/4 cup (8.5 oz) All-purpose flour
3 Large egg yolks
1.5 TBS Matcha (powdered green tea)
1 cup Granulated sugar (for coating)

Directions

(1)Preheat the oven to 350F. Line a sheet pan with parchment paper.
(2)Whisk the confectioner’s sugar and green tea together in a bowl.
(3) Add the butter and green tea/sugar mixture to the bowl of a stand mixer fitted with the paddle attachment. Mix until smooth and light in color.
(4) Add the flour and mix until well combined.
(5) Add the egg yolks and mix just until the eggs are fully incorporated and a mass forms.
(6) Form the dough into a disk and chill in the refrigerator until firm (about 30 minutes).
(7) Roll the dough out to ½” thickness.
(8) Cut the dough with a leaf cookie cutter.
(9) Toss each cut cookie in a bowl of granulated sugar to coat.
(10)Place the sugar-coated cookie on a parchment lined pan. Bake at 350F for 12-15 minutes, or until slightly golden around the edges.

Friday, March 12, 2010

Giant Cupcake Cake!

As I've hinted in my earlier post, almost immediately after my first order, I received my second order, for a dear friend Ee Wen's birthday. She's a friend I've known since kindergarten. That's a long friendship that's hard to beat! I was thrilled! For a friend, anything!

We brainstormed and she indicated she'd like a giant cupcake cake. I was intrigued. The first and only time I've seen a giant cupcake cake was in Sydney last October, at the Cupcake Bakery on Pitt Street. They were huge and were sold at AUD 40 each.

The large cupcakes were impressive, but as I've observed, quite tricky to decorate to create a classy look which maintains the 'cute' look that a cupcake should have.

We sat down and brainstormed one more day, and dropped by the cake supply shop for equipment to create the perfect giant cupcake cake. In addition, Ee Wen wanted regular sized cupcakes surrounding the giant cupcake. She knew exactly what she wanted. Cupcake with a large sunflower on top. The cake itself is to be her favourite cake, carrot cake with orange cream cheese frosting.

So a challenge is borne. I did a test bake of the cake with the new giant cupcake tin and the carrot cake recipe that Ee Wen requested, and it turned out great. She wanted mini oreos on the top of the cupcakes to serve as the sunflower's "centre". No mini oreos were found so I replaced with mini Chipsmore biscuits instead.

It's always good when a customer / friend knows exactly what they wanted, it's less hassle for me to figure everything myself. But also it brings the difficult challenge of whether I can recreate the idea in her head into a real 3-D cake, hoping it turns as she's imagined. It's definitely more challenging than I imagined.

After one day of baking, rolling fondant, colouring, shaping the fondant, piping, icing and washing up, the final product was completed, in time for the dinner yesterday night.


The ensemble! The candles had sparklers in them which intermittently gave mini fireworks. She chose a candle in the number "30" as well, to symbolize the special milestone. All in all, she was happy with the cake, and even said it looked like a toy!

A waitress from the restaurant even came up to me to ask whether I made it or bought it because she wanted to buy it. ;)

The guests enjoyed it, though I found it a tiny bit too sweet (even though I reduced the sugar) and the birthday girl said it the cream was a bit too sour. I made mental notes to tweak the recipe to improve it in future.

The restaurant was Las Carretas @ Taipan USJ. It's a Mexican restaurant, with a beautiful mural painted on one side of the wall.


The food was pretty good and healthy! Clockwise from left, Fajitas, Tortilla, part of the mural and Burrito. Basically many variations of rolled cornflour pancake with different fillings.

So this time I'm feeling more confident, steady and calm. I went about the task of baking, decorating, boxing and transporting the giant and regular cupcakes without breaking a sweat. I'm finally getting the hang of this! And may I add, it is infinitely more rewarding than completing a 15 hour day at work, or finishing a good piece of legal submission.

The lovely carrot cake recipe is below, adapted from Australian Women's Weekly. A classic recipe that is timeless and an all time favourite.


Carrot Cake with Orange Cream Cheese Frosting

Ingredients:
185 g butter
1 cup caster sugar
3/4 cup self raising flour
3/4 cup plain flour
1 1/2 tsp mixed spice
3 eggs
3/4 cup chopped walnuts
2 cup grated carrots

Cream cheese:
60g cream cheese
30g butter
1 cup icing sugar
1 tsp orange rind

Method:
1. Cream butter and sugar until light and fluffy.
2. Add eggs one at a time.
3. Mixed in chopped walnuts and carrot.
4. Sift in the flour and mixed spice.
5. Add to mould / cupcake liners and bake at 170 C until skewer comes out clean.

Frosting:
1. Cream butter, icing sugar and butter until combined.
2. Add orange rind and mix well.

Friday, March 5, 2010

The First Time...

A dear friend of mine was getting married in February and "booked" me to bake cupcakes for her church reception, since half a year ago. My first proper order! It was a challenge and I loved it!

First, to think of a theme for the cupcakes. The bride is a sweet and lovely girl, very gentle and feminine. I received her wedding invitation card, which was baby pink with a little rose ribbon on the top of the card...immediately everything clicked and fell into place.


The cupcakes would be nothing short of feminine, soft, floral and sweet...


She ordered 50 cupcakes for approximately 70 guests expected to attend the church reception.
I told her I'd try to make 70 if I could, so each one could have at least one.


On top of making 70 cupcakes for a wedding for the first time, I was also the maid of honour... so plenty of work for me before the wedding and during the wedding! I secretly wondered if I'd taken on too much. But then again, its not every day my dear girlfriend gets married, so it was going to be worth it.


Planning went on well, I made test designs for the bride to choose and had a few discussions with her on the general feel and design that she liked. She definitely liked rosettes, and also the traditional cupcake swirl.

So I decided on chocolate cupcake and vanilla cupcakes, to give guests a choice of 2 flavours. The buttercream is also super unique, and not the usual butter + icing sugar variety. I used Swiss Meringue Buttercream flavoured with melted white chocolate, so its not overly sweet and yet stiff enough to pipe designs to withstand our humid and hot weather. :)

To top of the designs the bride requested for silver dragees. So for the second design I thought of making pink fondant flowers of different sizes.

The cupcake stand was tricky. It had to fit the theme and also be special and "non-commercial". After doing some research on the internet I decided to make my own stand. After much running around over a few weekends, I think I got everything I need. I made a 4 tier cupcake stand using cake boards and covered it with shimmery pink paper. Styrofoam cake dummies were the dividers and "stand", and they were wrapped with silver ribbon. Finally I bought some beautiful and dramatic silver lace to line around the border of the cake stand.


The lace was the most unexpected find and finding it deserves a little story on its own. One day I was running errands I found an old and quite unassuming fabric shop in Old Serdang. It was a small shop with a musty smell smell mixed with the smell of canine. Rolls of ribbon, lace and tassles are stuffed into old glass sliding cabinets. The lady of the shop was watching television, which was propped on a table right in the middle of the shop. A shop reminiscent of simpler days of the past, of lazy afternoons and of housewives knitting as a hobby. A dog lay asleep right in front of the display cabinet, I had to wriggle my way between the shelves from the other side.

The shop has the most beautiful selection of gold and silver lace. There was so much possibility for crafts and art! I visited the shop twice before I purchased the lace, all 4 metres of it. It was the last place in my mind that I would find such a beautiful piece of lace and now I know the secret place to go. ;)

The final result on the day of the wedding:


One day I'll write a post about making the cupcake stand.

The bride was beautiful on that day. The church wedding was at the beautiful Holy Rosary Church in Brickfields and it went without a hitch. I kept my eye on the veil at all times to make sure it was in place. The bride commented that the cupcakes were beautiful! How sweet.


Job number 1 was a total success. I can't wait for more!

It wasn't long before I got commissioned for job number 2... A challenge of higher proportions!

Stay tuned for more!

Sunday, February 21, 2010

Inaugral Post!

Hello and welcome to my humble baking blog!

I've been blogging previously on blogger at this site. The previous blog was a mish mash of updates in life, trips I've taken plus some rants and raves in life. As 2 years passed, I came to realise almost all my recent posts were cupcake related. It was not intentionally so, but sometimes things turn out that way, and since then i've had a quasi baking blog.

As the new year rolled in, the seed of an idea to start a new blog dedicated to baking was planted. Through the past few weeks, the idea sprouted and took form...

So here I am, at the start of the year, with a fresh new blog.

To start the ball rolling, let me introduce you to one of my favourite flavours in the world - GREEN TEA.

Green tea is traditionally a Japanese drink. The clever Japanese have long discovered the benefits and healing qualities of green tea, which is essentially a tea leaf that is not fully oxidized. Chinese drink green tea traditionally too, but mainly the black teas are more common.

In the past decade or so there has been a reintroduction to this healthy substance not only as a drink, but infused into cakes, ice cream, biscuits and all sorts of yummy things. In my old blog I did a post about my favourite green tea foods, go have a look at it should you feel curious to learn more.

Recently Flavours magazine featured recipes from famous bakeries and cakeshops in the country. I was over the moon and considered buying 5 copies of the magazine as keepsakes! How many times can you get a whole collection of the yummiest desserts in town, full recipes and method of baking fully disclosed? It's a treasure trove!!

Over the year end holidays, I tried out the Green Tea Sponge Cake by San Terri. San Terri has branches at Bangsar Village 2, Hartamas Shopping Centre and Menara Hap Seng, amongst others. The first thing I noticed about the shop was its funky fabrics on their sofas. The ambience is casual chic with a hint of elegance.

The recipe was a success! The folded in egg whites created a fluffy and light texture, and the cake did not need rising agents! No baking powder, no soda bicarb! It was really really good.

Try it for yourself and tell me how you like it!


Recipe:
Green Tea Cupcake
110ml vegetable oil
130 ml milk
180g flour; sifted
10g green tea powder
4 eggs, separated
150g caster sugar

Instructions:
1.Preheat oven to 180c. Line cupcake tin with liners.
2. In a large bowl, combine oil, milk, flour and green tea powder; add egg yolks and mix to combine. Set aside.
3. In an electric mixer, whisk egg whites and sugar to the soft peak stage. Gently fold into flour mixture and pour into cupcake liners, 2/3 full.
4. Bake for 15-18 minutes or until toothpick comes out clean when inserted.

Custard Cream
270ml milk
60g custard powder
270ml whipping cream

Instructions:
1. In an electric mixer, add milk and custard powder. Mix until smooth.
2. Add whipping cream and whisk until light.
- I did not get a light cream. Instead I had to put the mixture on top of a stove to lightly heat, while whisking continously, until custard thickens. Refrigerate until ready to pipe.

Wednesday, January 20, 2010

The Test Post

Testing testing